Below are excerpts from the email I just sent to club members. Click here to request a copy of the step-by-step video and example workbook I used…
The following files are to be used for your review of this week’s tutorial:[1[ Step by Step screenshot video tutorial – this was emailed to you via pCloud Transfer BEFORE this broadcast. See your email inbox.Here’s a brief transcript excerpt from the video.
Let me know if you need any help replicating or putting the demonstrated concepts into use,
So, this is the expense section of the cash book. Remember 2 weeks ago, we insert the columnn (cost center) headings from the settings table into the expense table header row using the TRANSPOSE function – you can see it in the formula bar, in an array formula of sorts.
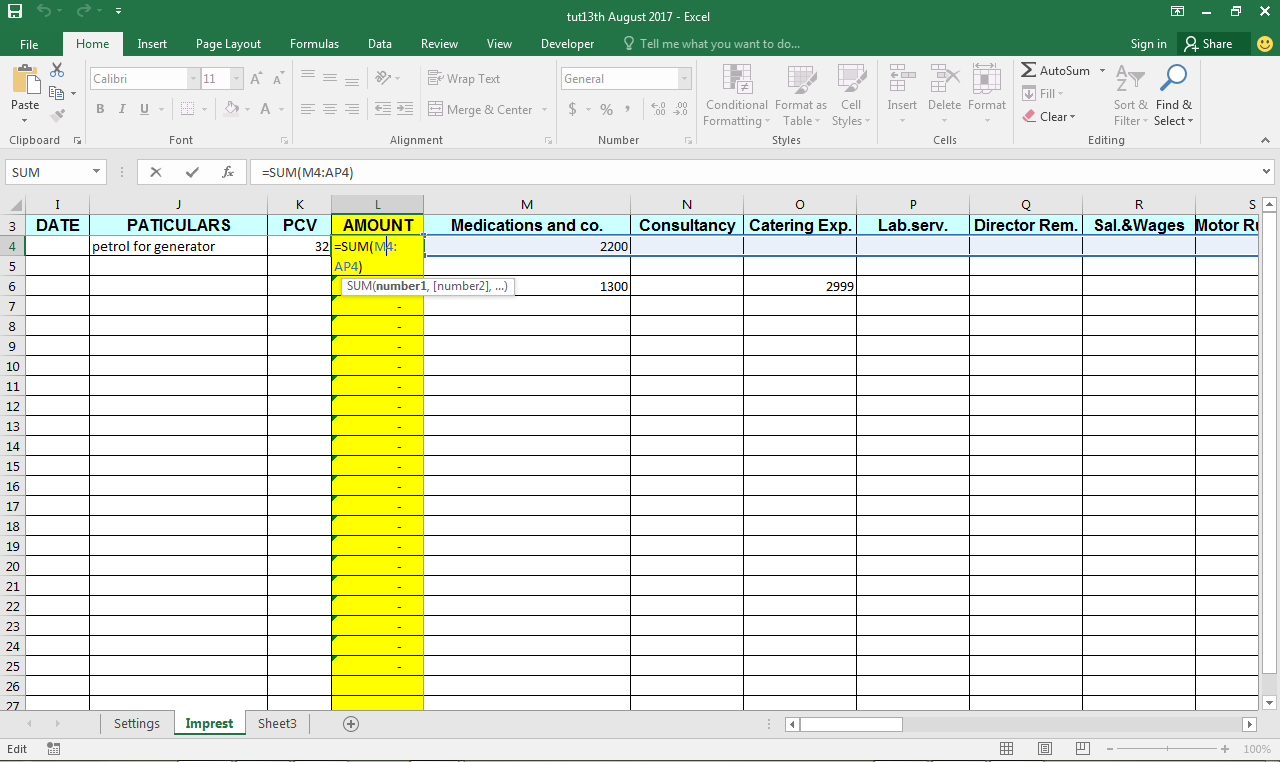
Now we’re going to put in formulas into the (cells in then) AMOUNT column, then freeze it in a way that enables us post values under ANY of the expense heads, along the row to the right, while being able to view the totals adding up for that Payment (Or Petty Cash) Voucher entry for that row/date.
This will make it easy for the user to quickly compare the total on the source/raw paper document (e.g. ledger) being used to that generated by the app’s table, in the AMOUNT column, so that any differences can be instantly detected and/or reconciled.
Watch the video to see how it’s done.
[2] Example workbook used in the video demonstration, complete with the new features/functions added – attached to THIS email (See screenshot below)

Source: ExcelVB
